How to Save a Search
Easily return to the views that matter most — no need to start from scratch every time.
When you’ve filtered down to just the sessions you care about — a specific event pattern, device type, or time window — saving that search lets you revisit it instantly in the future, without reapplying filters manually.
This guide walks you through how to save a search step-by-step.
Goal
Save a filtered session view for fast, repeated access — ideal for tracking a live investigation, reviewing high-risk behavior patterns, or monitoring ongoing fraud activity.
Steps to Save a Search
1. Navigate to the Sessions Search Page
From Spec Hub interface, click the Search menu item. This is where you can explore individual customer sessions and apply a wide range of filters to focus on the behavior that matters to you.
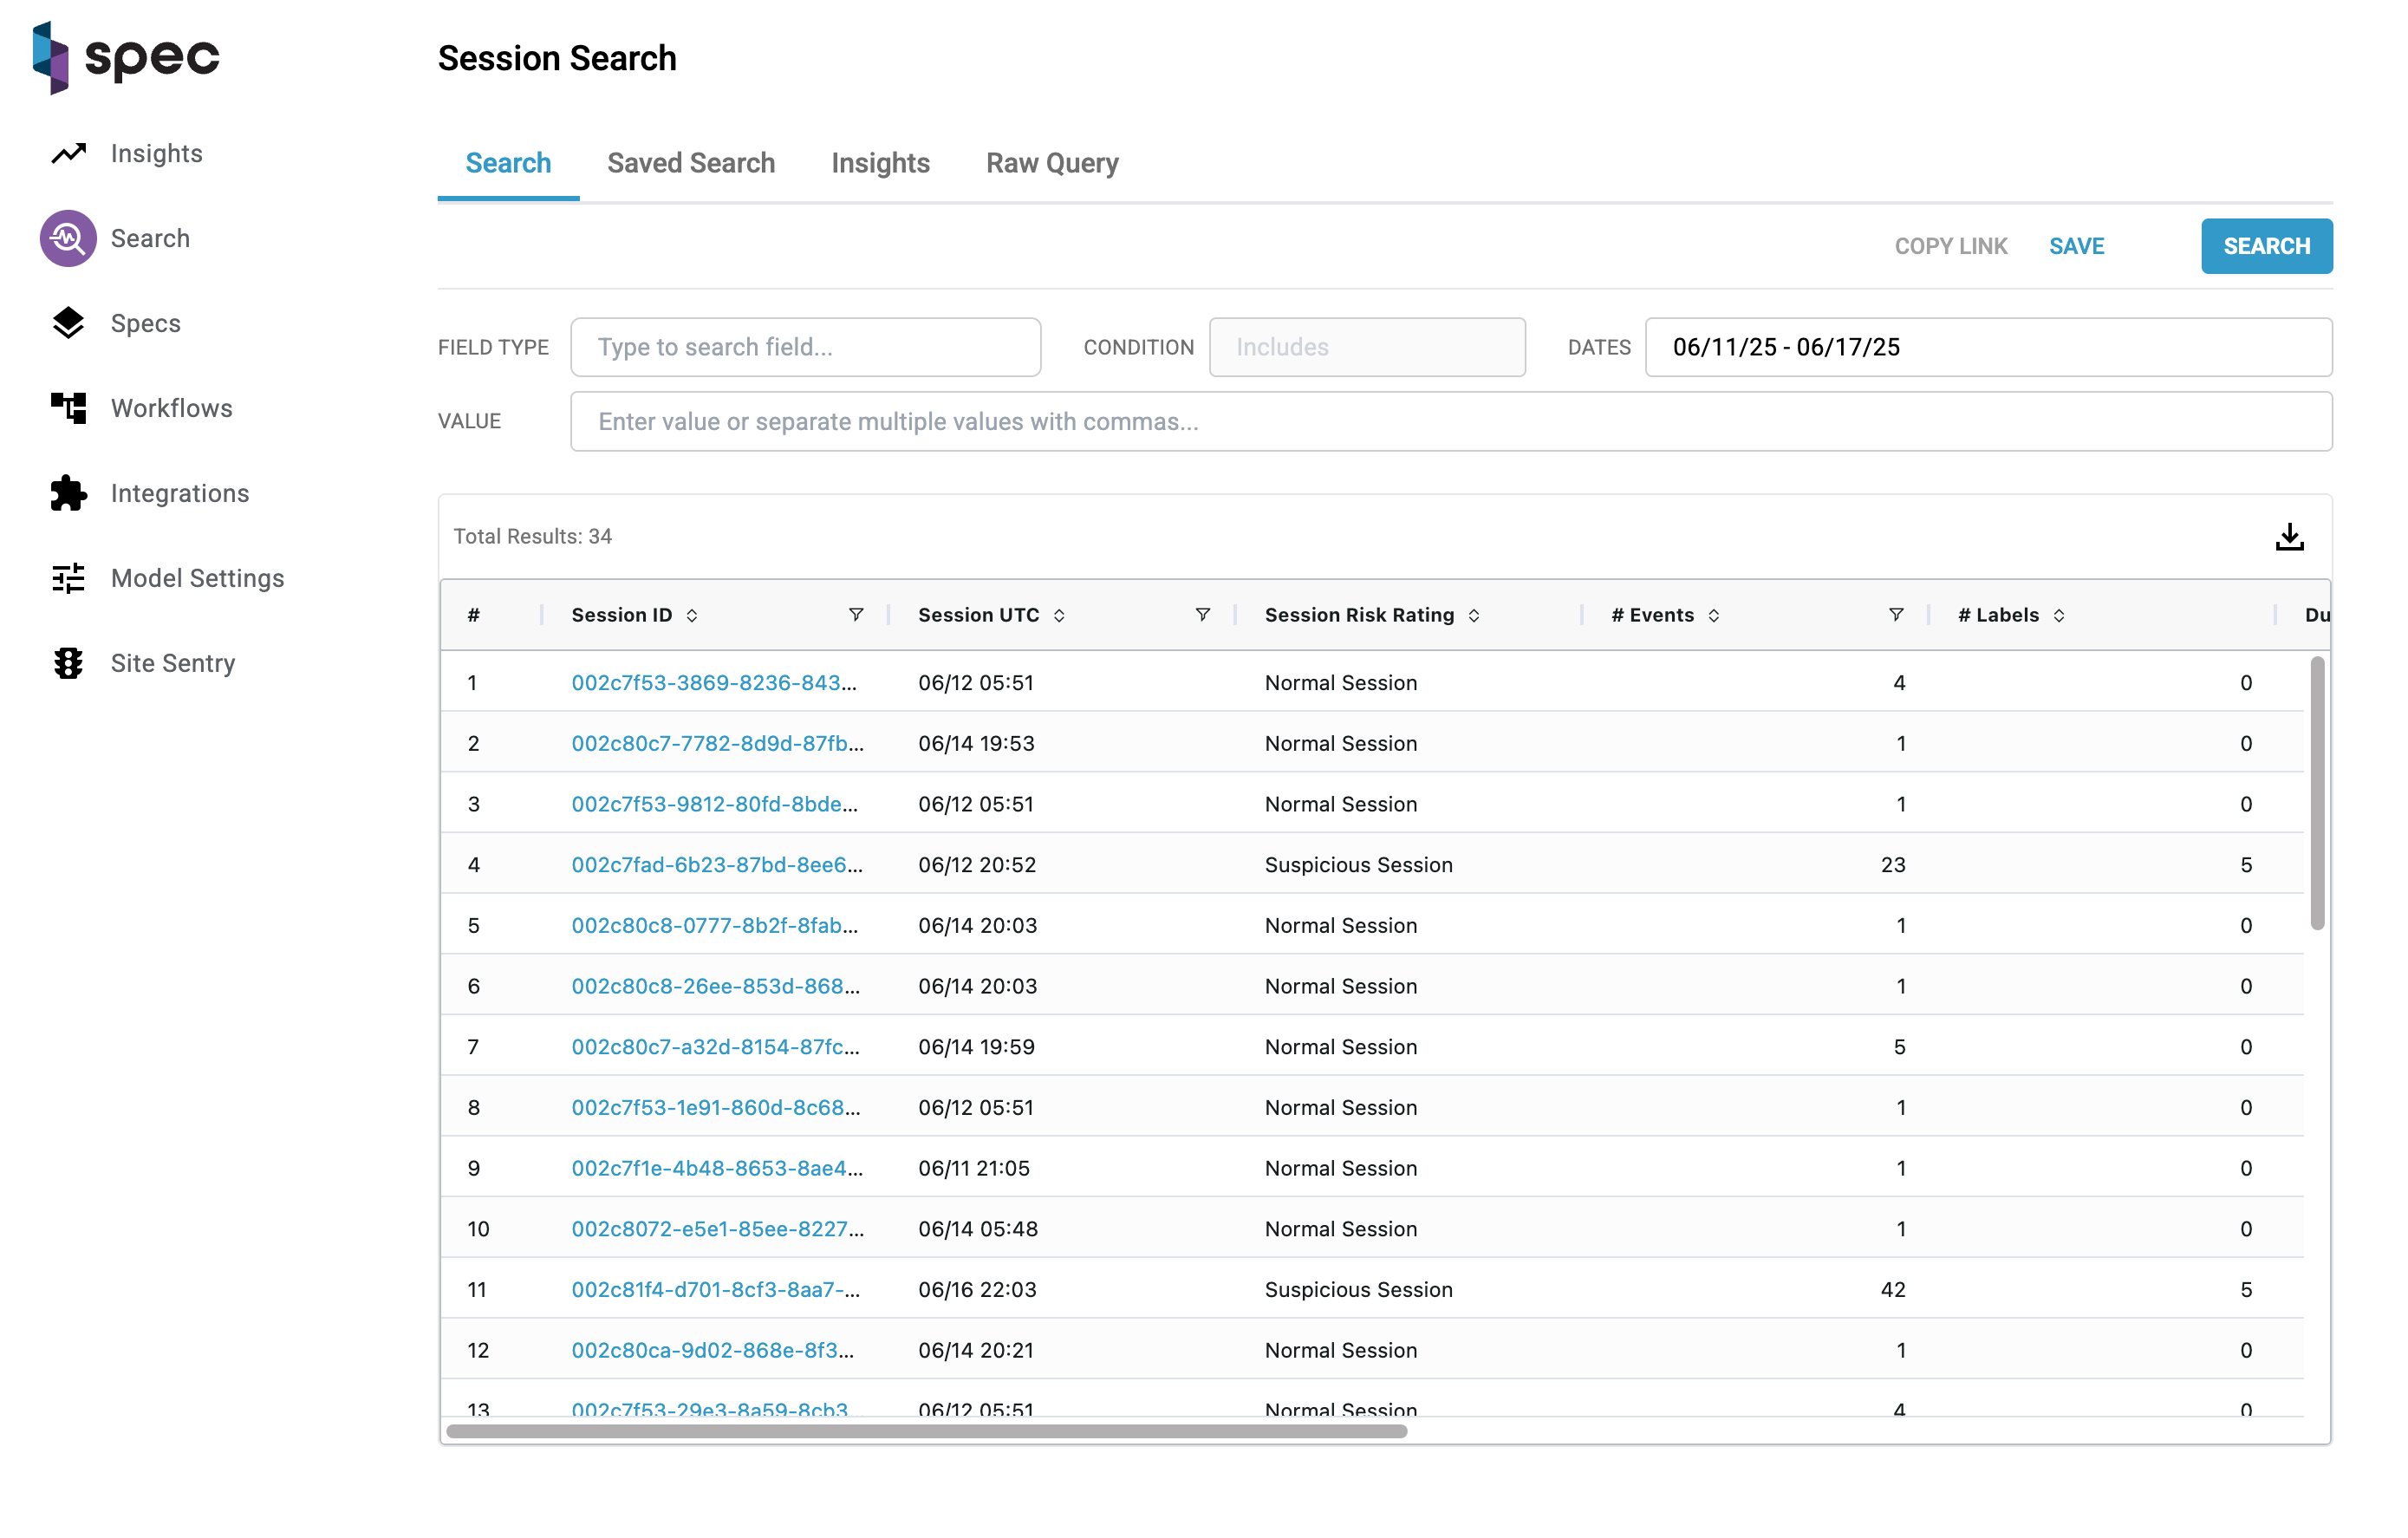
2. Apply Filters
Use the search filters to narrow down the data to your area of interest. This can include:
- Field-based filters: for example, sessions with a specific value in a field like
event_typeordevice_id. - Time range filters: such as the last 24 hours or a custom date window.
Learn more about filters and search syntax here.
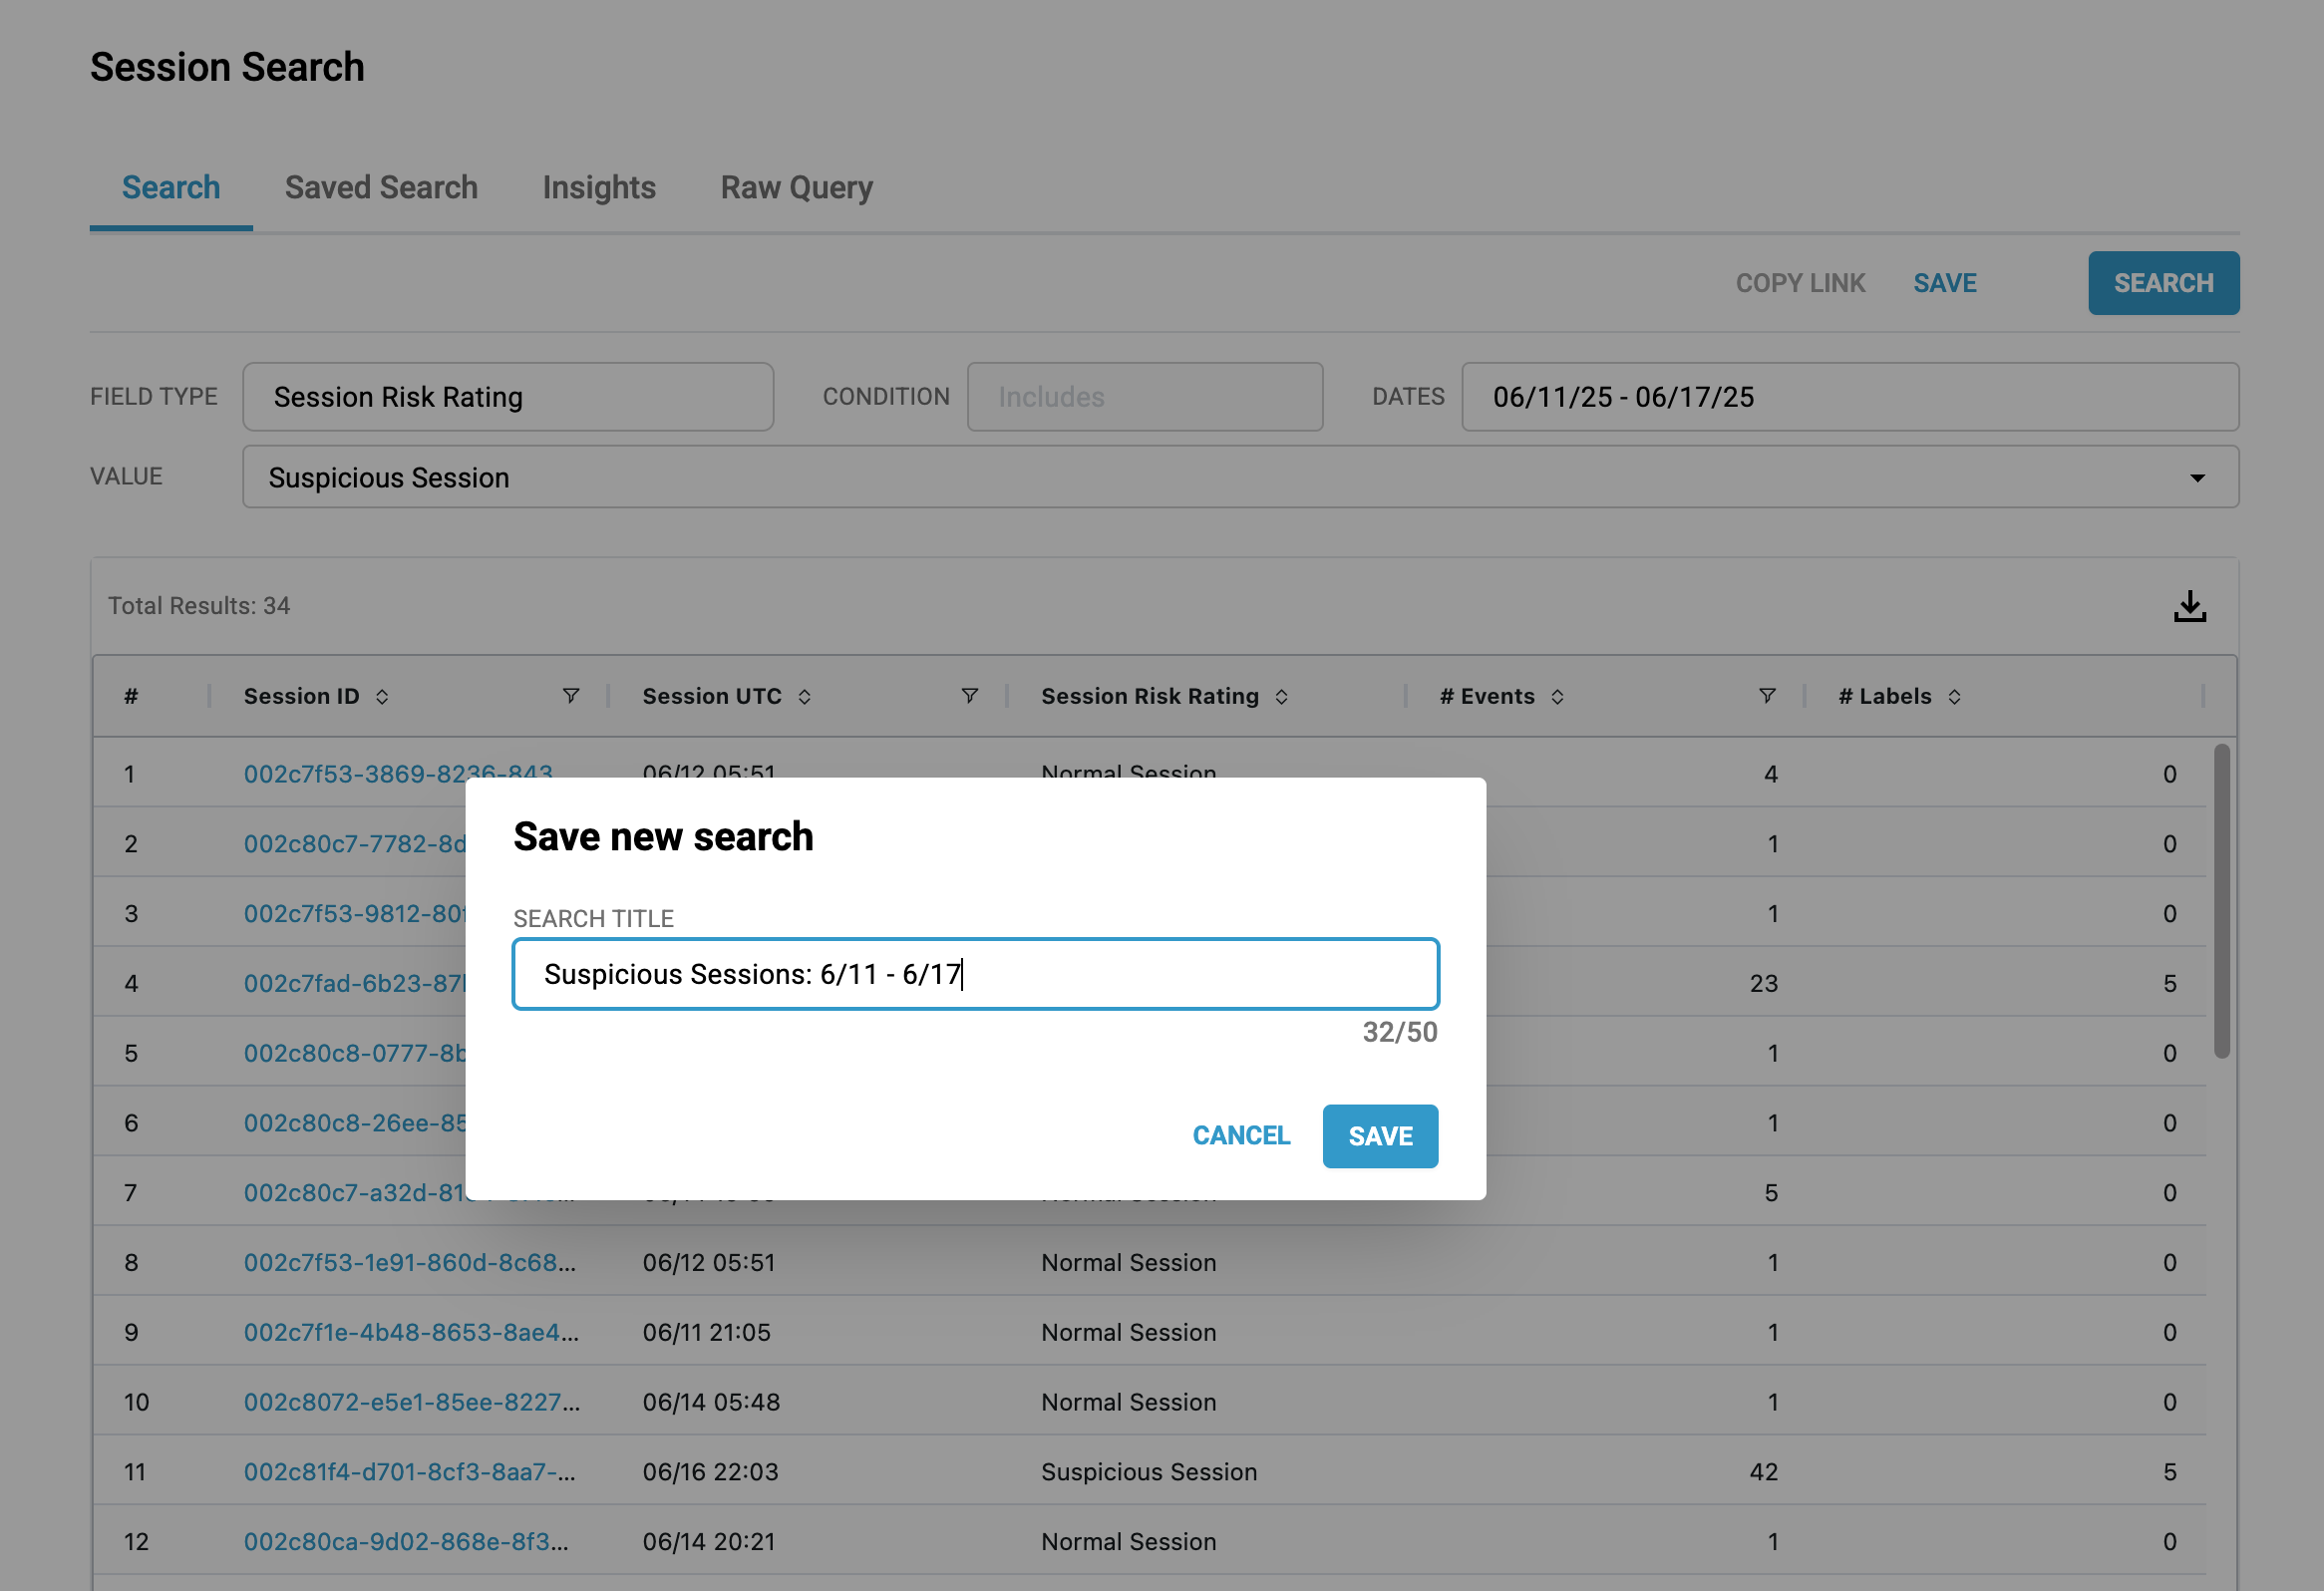
3. Click “Save”
Once your search is configured the way you want it, click the Save button at the top of the search results panel.
4. Name Your Saved Search
After clicking Save, a modal window titled “Save new search” will appear.
- Enter a name that clearly describes your search in the input field.
- Click Save in the modal to confirm.
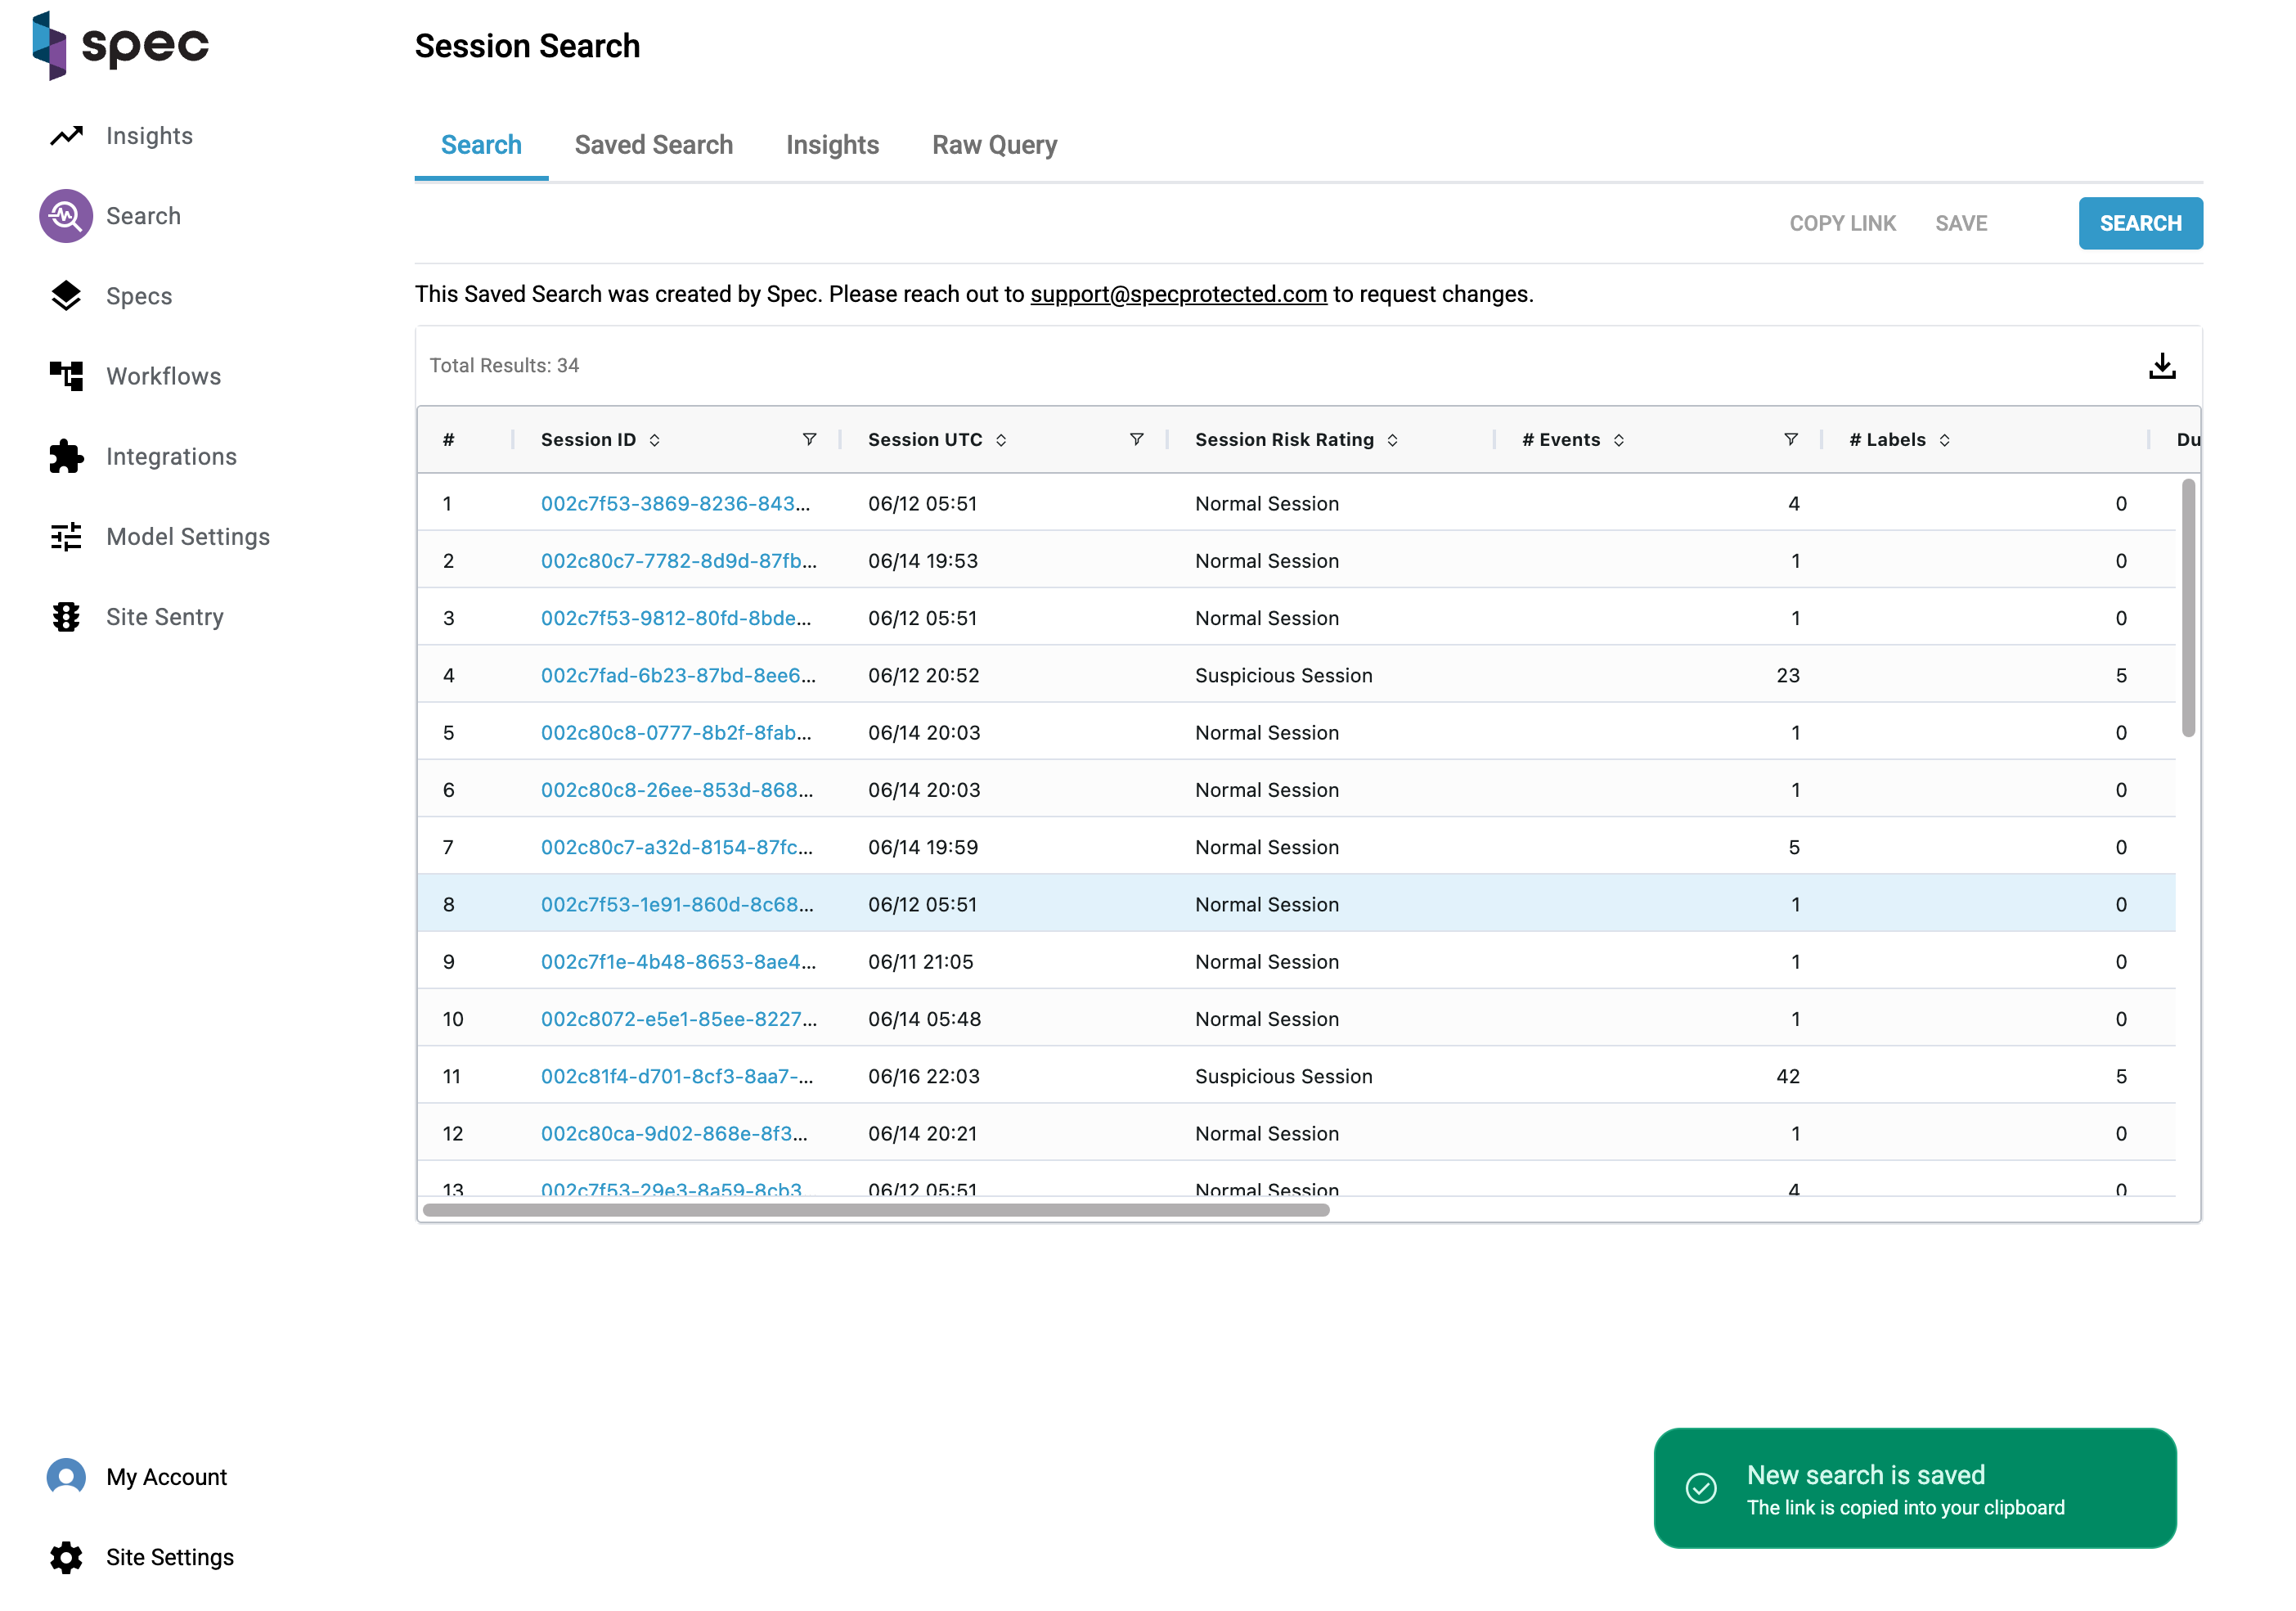
5. Confirmation and Redirect
Once saved:
- You’ll see a confirmation toast: “New search is saved.”
- A direct link to the saved search will be automatically copied to your clipboard — ready to paste and share.
- You will be redirected to the saved search page, where you can view the results immediately.
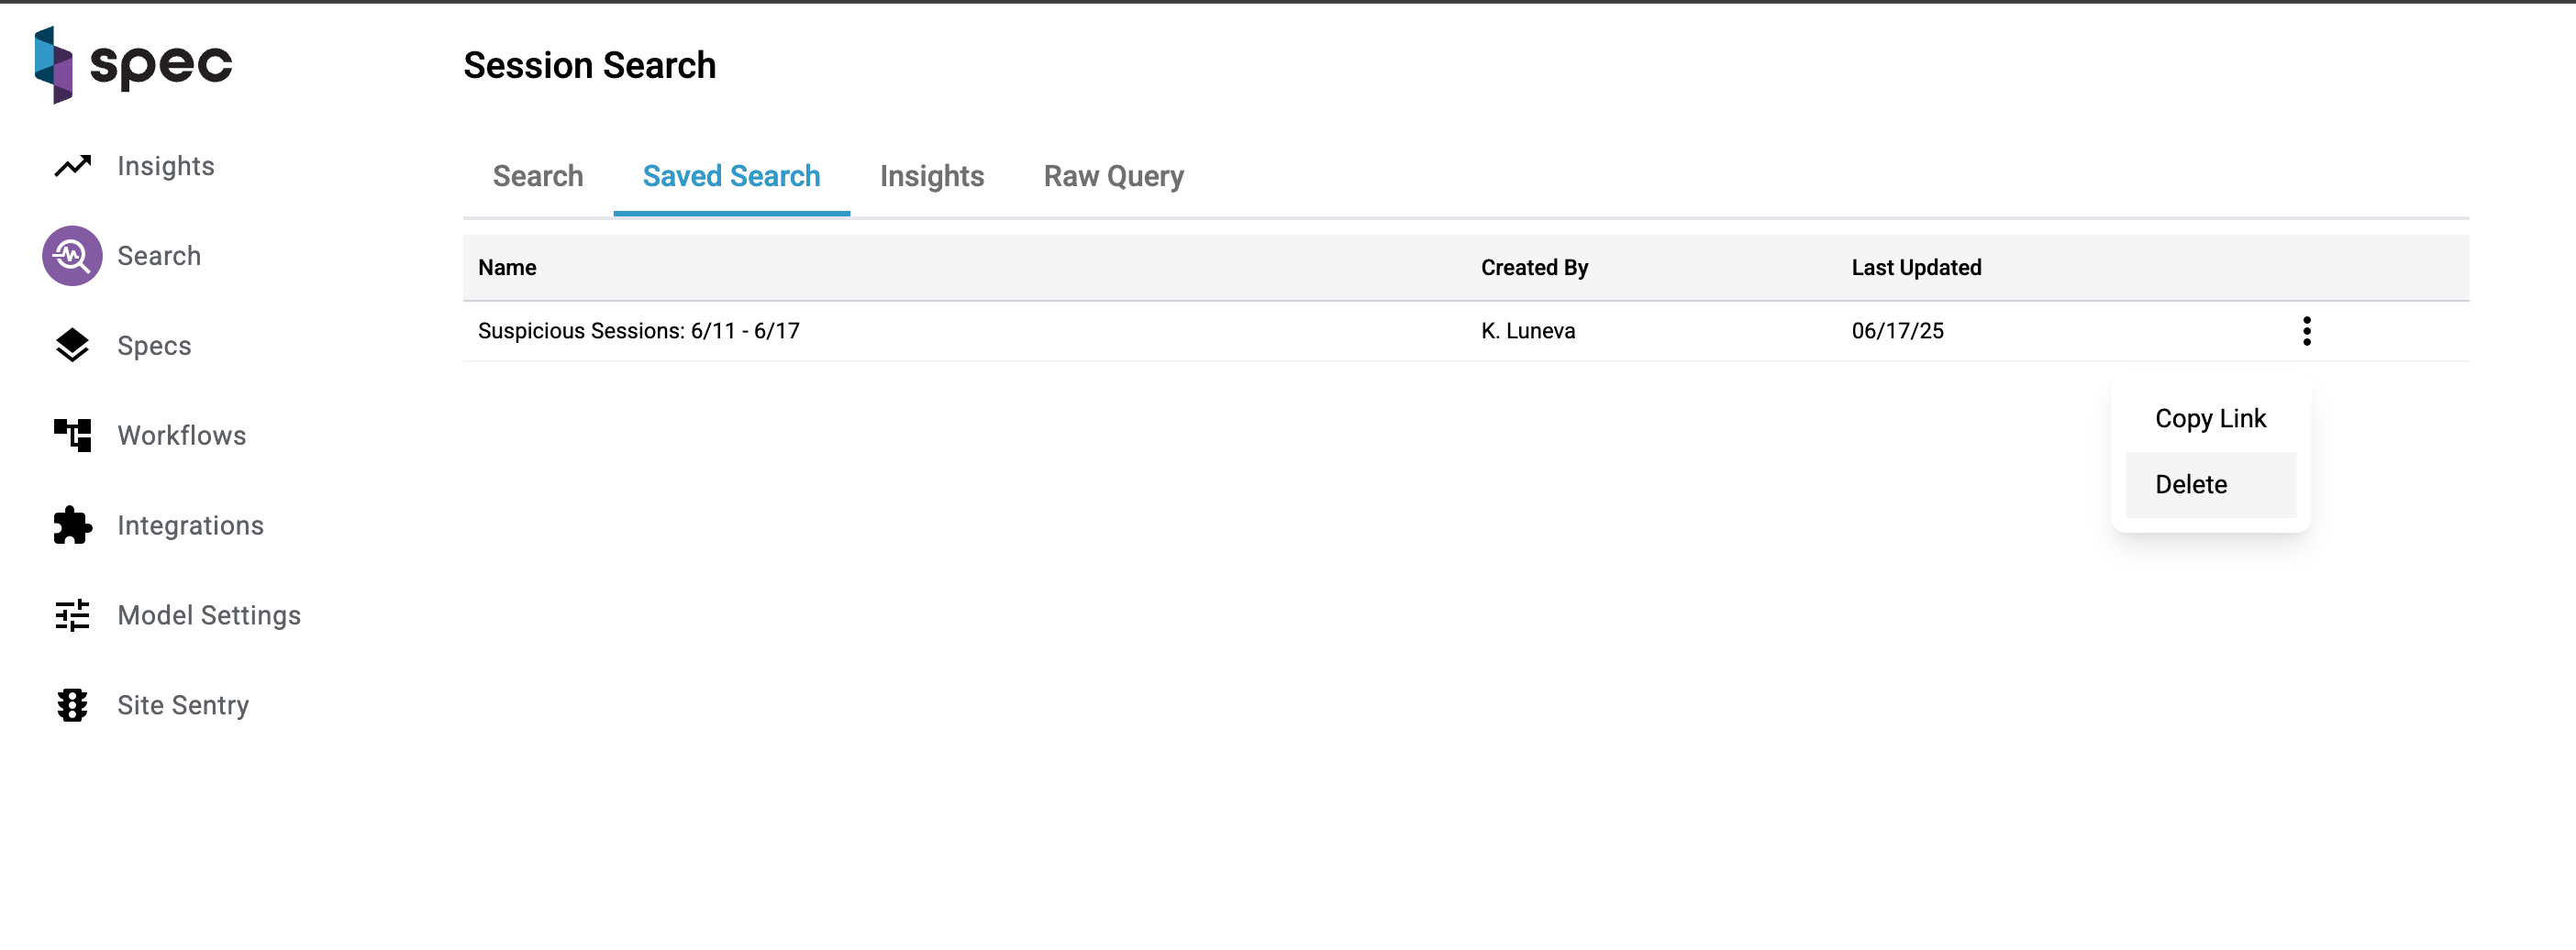
How to Access a Previously Saved Search
Saved searches are always accessible from the Session Search page.
- At the top of the page, locate the tabs near the filter area.
- Click the “Saved Search” tab.
- You’ll see a table of all saved searches associated with your environment.
- Click on the row of the search you want to revisit — you’ll be taken directly to the filtered session results.
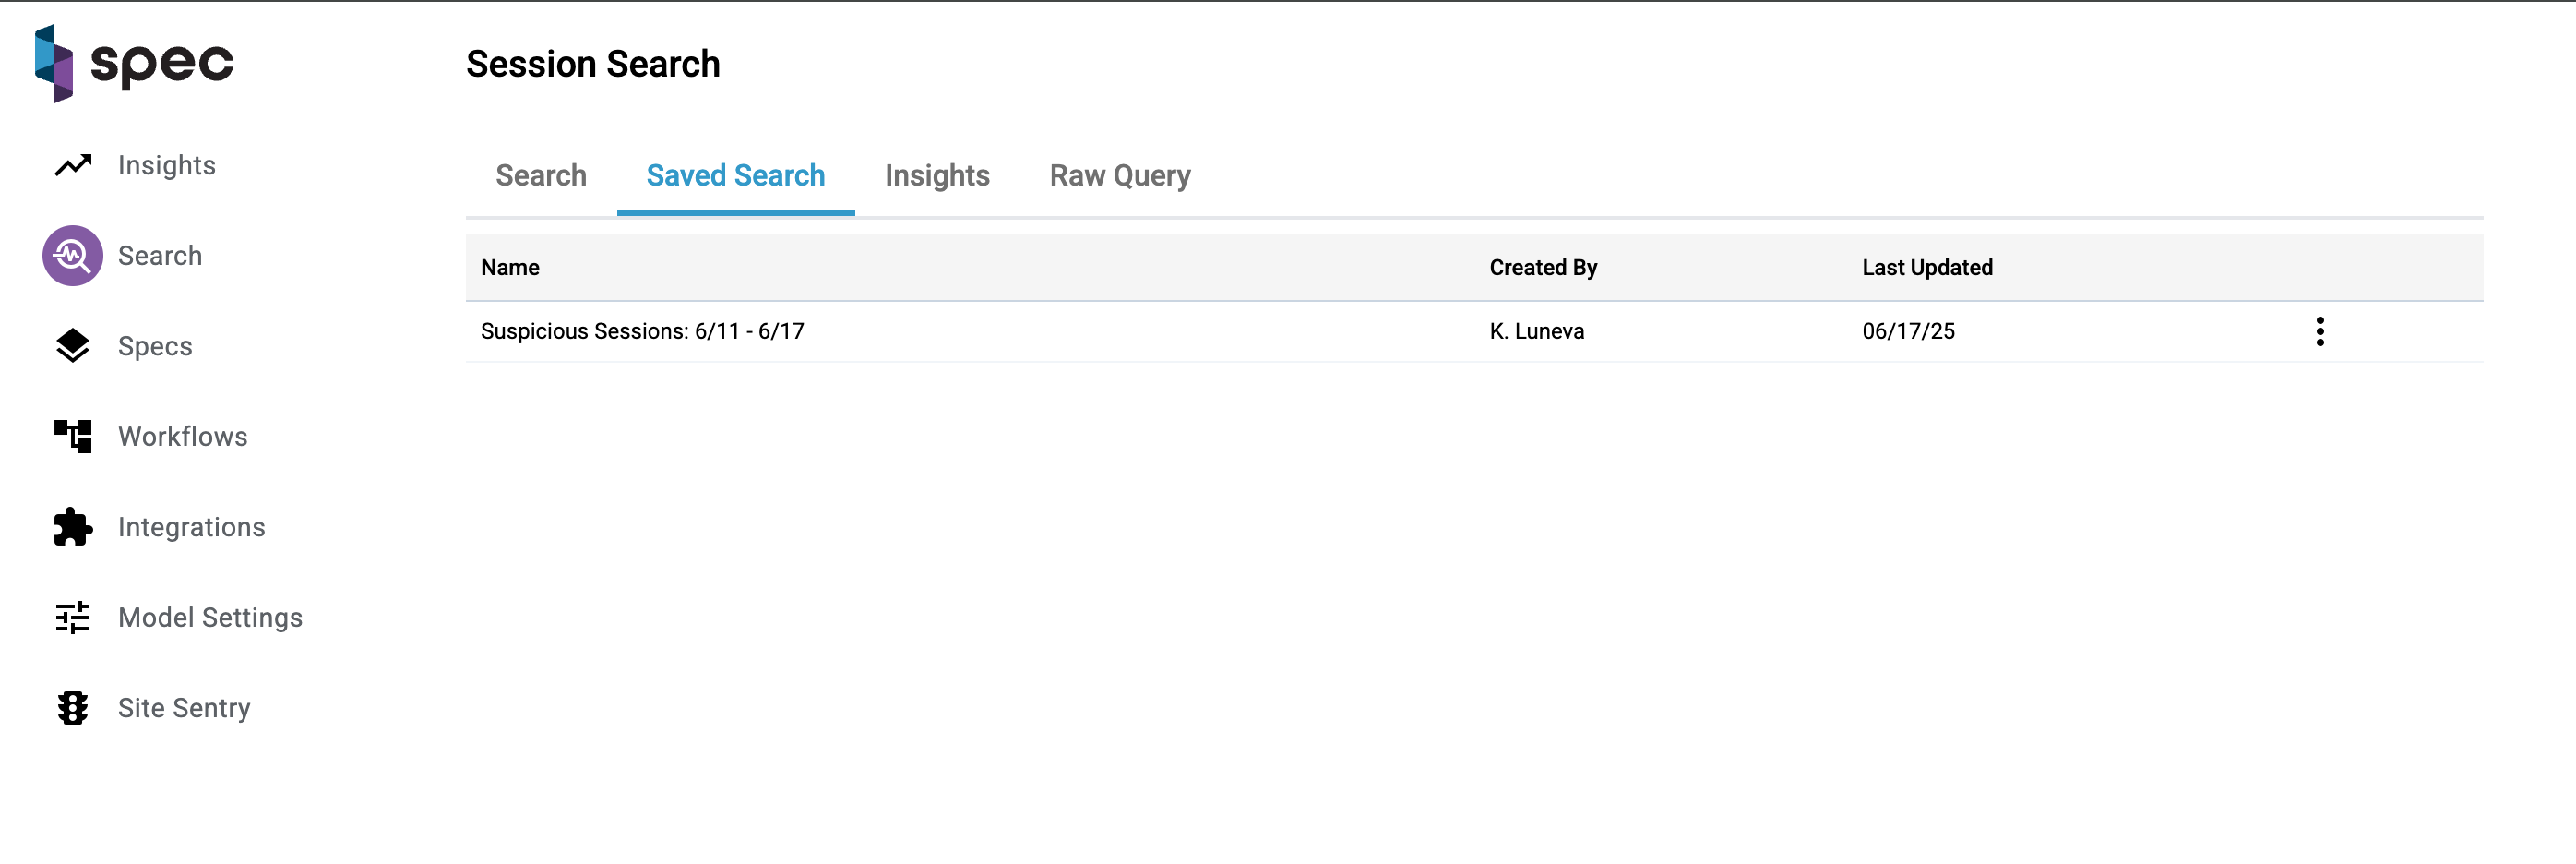
From this same table, you can also:
- Copy the link to any saved search to share it quickly with others.
- Delete a saved search if it’s no longer relevant to your workflow.
When to Use Saved Searches
-
Repeatable Investigations: Returning to the same filter set daily or weekly? Save it.
-
Team Collaboration: Share consistent filters with teammates to align reviews and workflows.
-
Ongoing Monitoring: Track behavior over time with saved searches you revisit and refine.
Keep It Organized
note
Over time, you may accumulate multiple saved searches. Consider using naming conventions that reflect the use case, audience, or time frame (e.g., High Risk Devices - Last 7 Days, Refund Spike Review, Policy Abuse Watchlist).